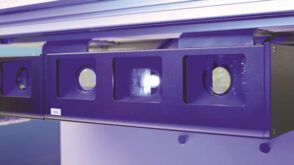
3D Scanner System
I-Guide3D 350 Scanner: Maximum Precision for Fully Automated Leak Test Systems

3D scanner in action, using advanced technology to measure precisely.
Millimetric precision is crucial in fully automated leak test systems. On a refrigerator or heat pump production line for example, the position of all test points must be determined with millimetric accuracy. Manufacturing tolerances of +/- 1 cm in all directions for the position of solder joints have long been a challenge of robotic leak testing.
INFICON has developed the first fully automated 3D robotic leak testing system for your end-of-line inspection. The system includes the new I-Guide3D 350, an intelligent 3D sensor which moves the robot arm to the next inspection point, with millimeter precision, always along the shortest and fastest path. As a result, this 3D robotic leak testing system can meet the highest accuracy requirements of HVAC/R industry.
The 3D image recognition system from INFICON uses structured laser light. The laser light makes the scanner independent of brightness fluctuations in the ambient light. The software developed for this application, converts the 3D camera’s point cloud into x-y-z coordinates so that it controls the robot arm for very short cycle times and without collisions.
Four Components for Your Intelligent Test Station
The 3D Robotic Leak Testing System solution includes four components that complement each other perfectly:
- Ecotec® E3000 – the multi-gas leak tester
- I-Guide3D 350 – the intelligent 3D Sensor
- I-Tip – the innovative and patented sniffer tip
- Calibration leak – our test leak for fully automated calibration
Advantages at a glance
- Software is optimized for finding joints by looking for change in diameter
- Robot path planning is done by the software for optimized cycle time
- Software does collision check all along the robot path
- Software checks for singularity of the robot
- No robot programming needed to convert x-y-z-coordinates into robot movement
Specifications
| Resolution | <= 0,01mm |
| Scanning volume | 350 x 350 x 250 mm (13,8×13,8×9,8“) |
| Minimum distance to test object | 450 mm (17,7“) |
| Dimensions | 270 x 53 x 130 mm |
| Weight | 2,7 kg |
| Safety class | 3R |
| 530-200 | Package with 2 scanners; incl. all necessary accessories * |
| 530-201 | Package with 1 scanner; incl. all necessary accessories * |
| 530-xxx | Installation |
| 530-xxx | Training on software |
| * Accessories: Power supply 24V, Controller Beckhoff, Software-License, Cables, Ethernet switch, Calibration tool, Support for scanner |
| 12329 | Refrigerant test leak R600A with proof port |
Downloads
Contact us today to discuss the requirements for your custom automation solutions.
